Pipeline
The Pipeline module is a central feature of the mlangles mlops platform that enables users to build and manage end-to-end machine learning pipelines.
Instead of spending valuable time cleaning and reshaping raw data, the Pipeline module automates the process—standardizing input data into the exact format your models need. With configurable, repeatable workflows, it ensures consistency, accelerates model training, and frees your team to focus on innovation rather than manual prep work.
Creating a New Pipeline
The first step in any machine learning lifecycle is creating curated, model-ready data. With the Pipeline module, this process is simple and repeatable.
Users can create new pipelines and apply a series of configurable functions and transformations to raw data, turning it into high-quality datasets ready for ingestion and training. Each pipeline step ensures consistency, scalability, and reliability—so your models are always trained on the right data, every time.
Accessing the Pipeline Module
Navigate to the Pipeline module by selecting the corresponding icon from the left-hand sidebar. The module’s landing page presents a tabular view of all existing pipelines. Each row in the table provides key metadata, including:
- Pipeline Name
- Associated Project
- Created By
- Createion Time
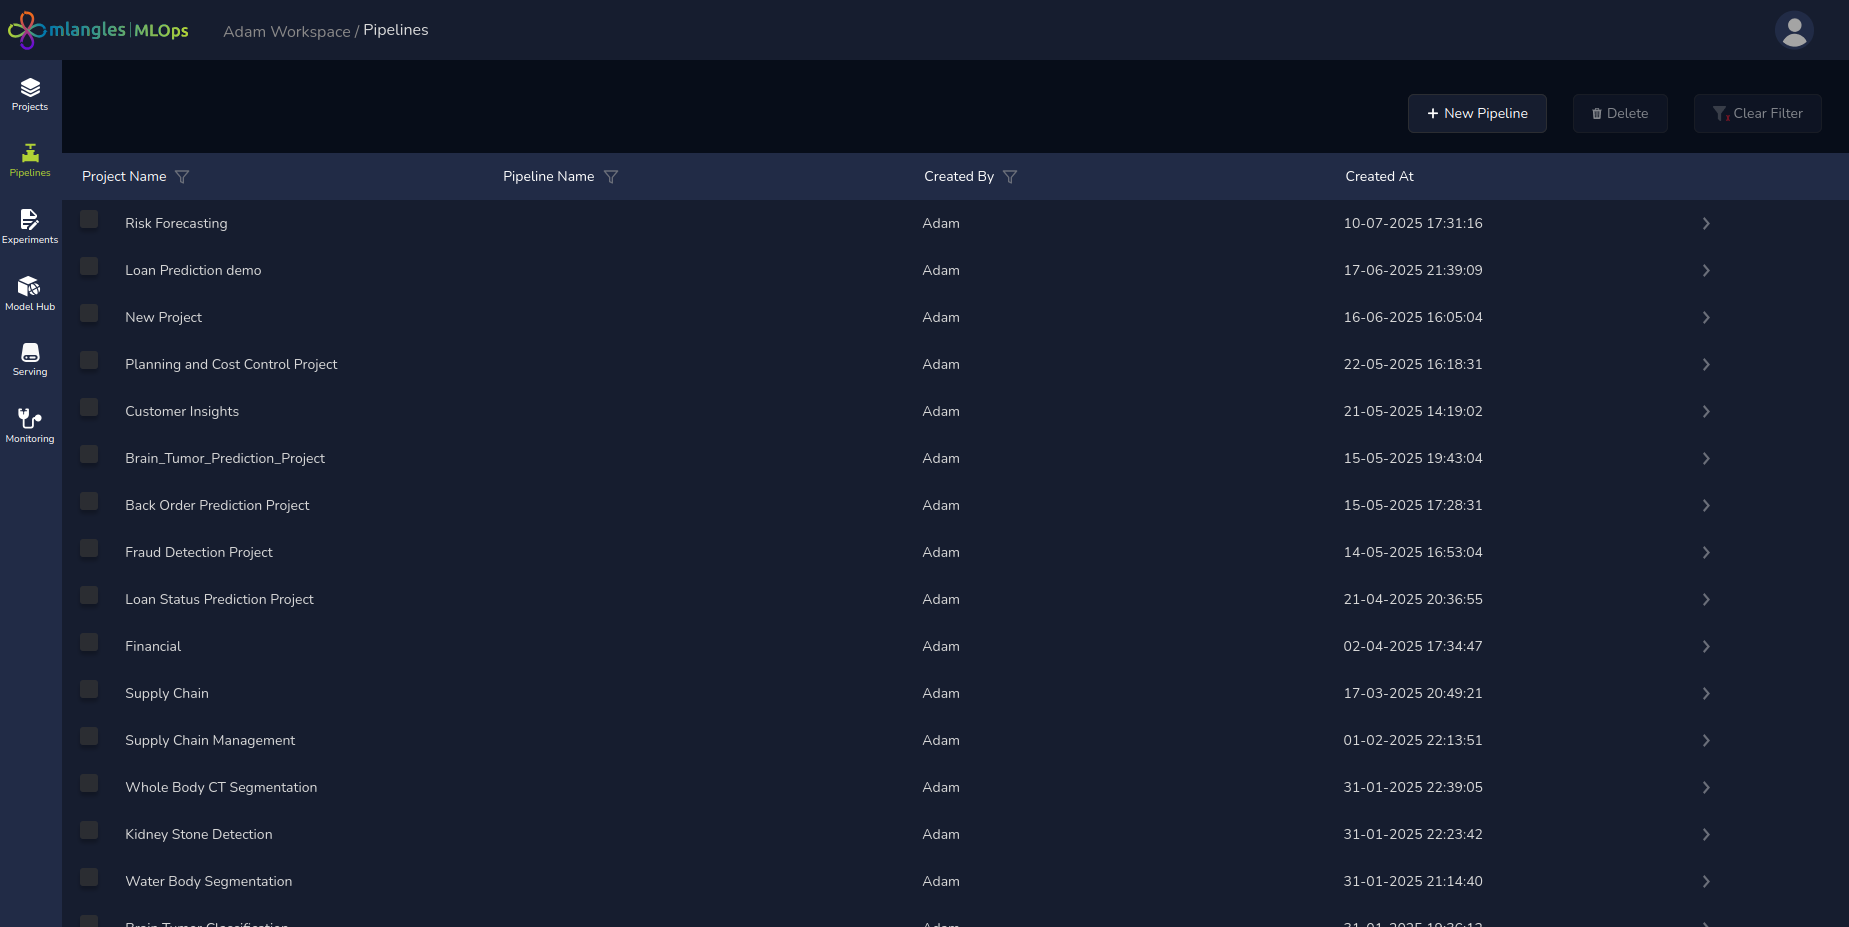
Pipeline homepage
Creating a New Pipeline
To initiate a new pipeline:
- Click the "New Pipeline" button located at the top-right corner of the Pipeline page.
- Complete the form presented on the screen with the following required inputs:
- Pipeline Name – A user-defined name that uniquely identifies the pipeline.
- Project – A dropdown menu listing all available projects. The user must select the project under which this pipeline will be grouped.
- Destination Data Source – Select the key associated with the destination database (e.g., an S3 bucket) where the processed output data will be stored.
- Note: These keys must be preconfigured by the administrator in the Access and User Management section and assigned to the user.
- Repository Credentials – Choose the GitHub key linked to a repository where the platform will store the auto-generated pipeline code. These credentials are also managed by the administrator and assigned to individual users.
- Industry – Select the applicable industry vertical (e.g. Finance ). This selection may influence the pipeline templates offered by the platform.
- Problem Statement – Provide a description of the business problem the pipeline aims to solve.
- Example: "Design a pipeline to process card transaction data and train a model to detect fraudulent transactions."
- Steps – The platform, powered by an integrated LLM (Large Language Model), will auto-generate a suggested set of pipeline steps based on the selected problem statement. Each step can be used to do a different task within the pipeline. Users can review and optionally remove any of the proposed steps before saving.
- Click on next to be taken to the pipeline code generation screen
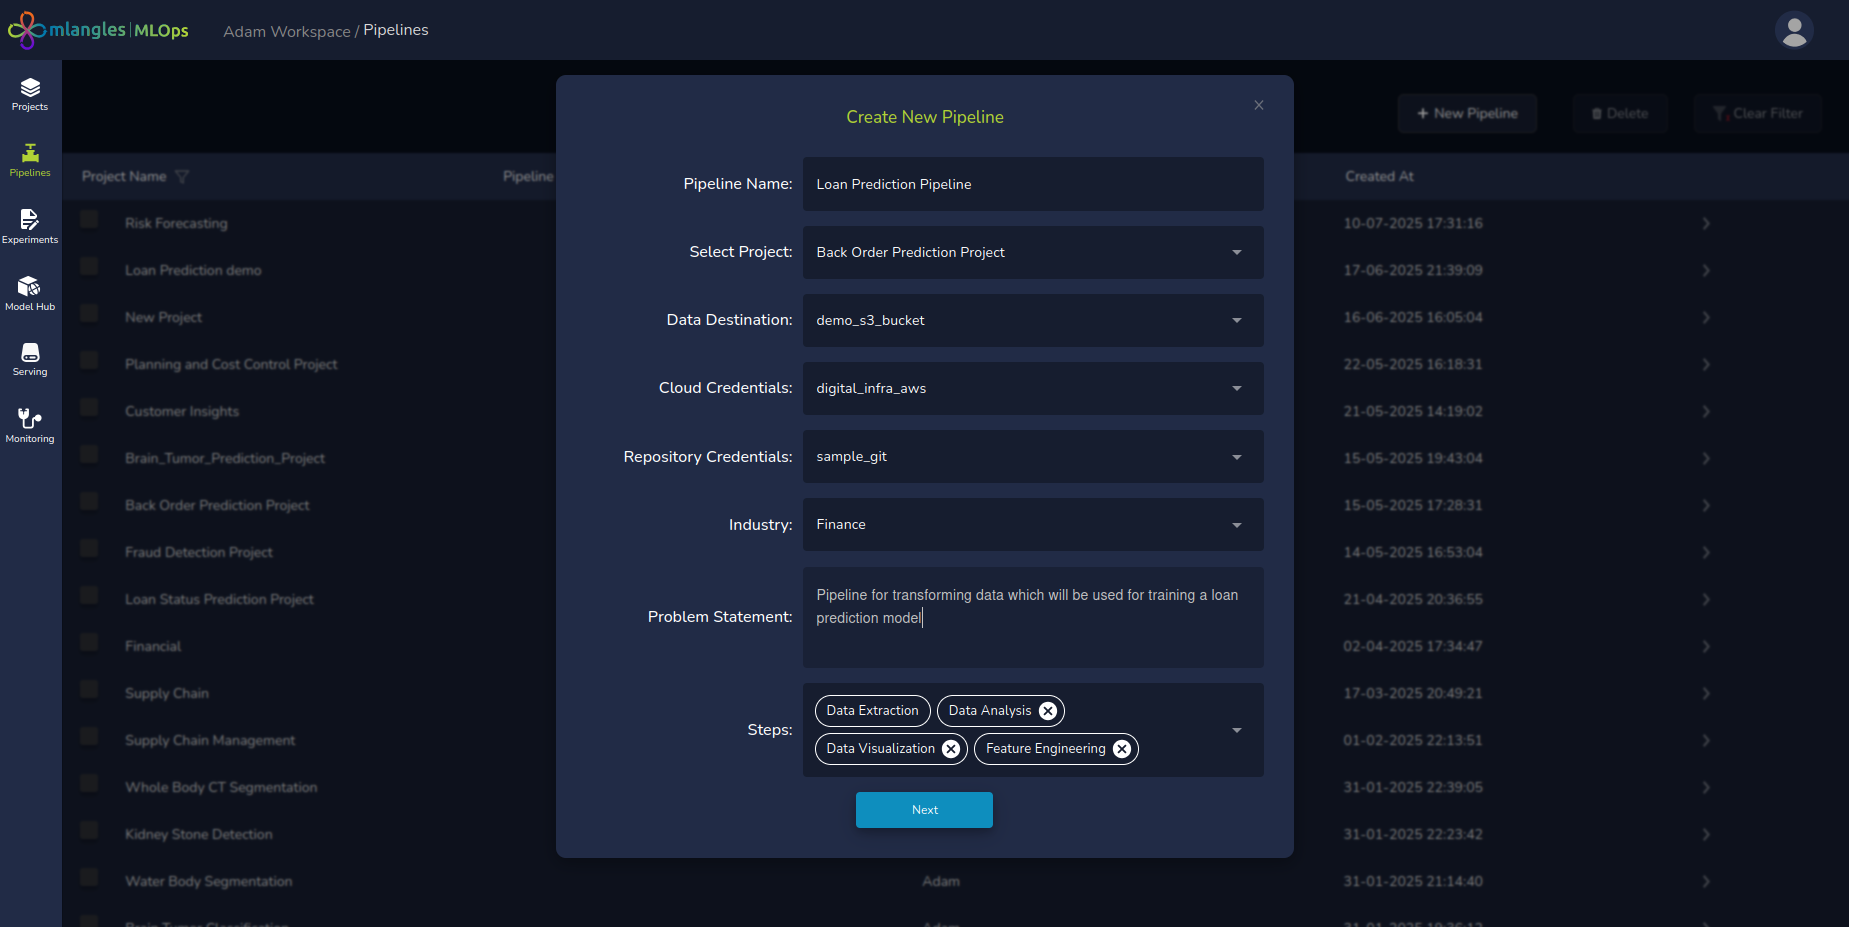
Figure 5 - New pipeline
Pipeline Code Generation Interface
Upon completing the pipeline configuration form and clicking Next, the user is directed to the Pipeline Code Generation screen. This is an interface that provides a visual representation of the pipeline and facilitates step-based customization and generation of code using natural language prompts.
Pipeline Visualization and Editing
At the top of the screen, a pipeline flow diagram displays all configured pipeline steps in the order of execution. Users can:
- Reorder Steps: Drag and drop steps to rearrange the execution order of steps.
- Delete Steps: Remove any step that is not relevant to the pipeline.
- Creation of Steps: Create and add any new steps inside the pipeline
- Selection of any pipeline step for code generation
Prompt-Based Code Generation Panel
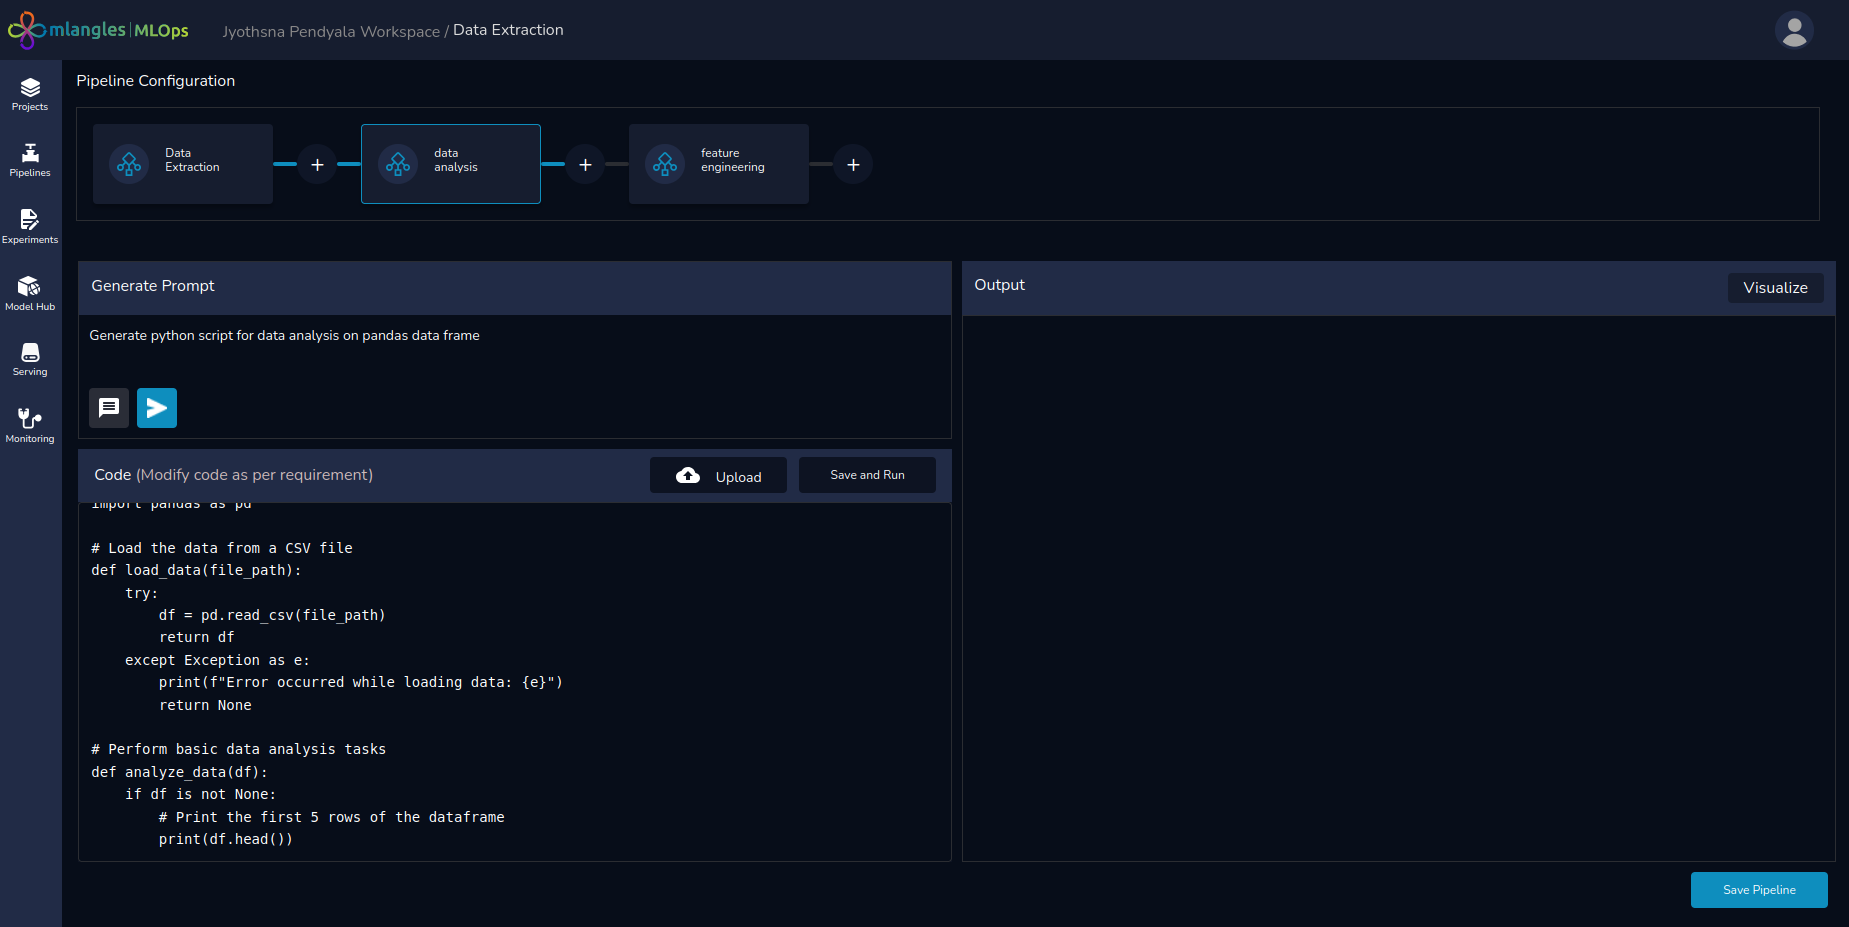 Figure 6 – Pipeline Codegen Screen
Beneath the pipeline diagram, on the left-hand side, the user will find a prompt editor panel for interacting with the Large Language Model (LLM) to generate code.
This panel includes:
- Code Generation – The Code Generation feature (white arrow button) allows users to instantly create code for a pipeline step based on their input prompt. Simply describe the task you want the step to perform, and the integrated LLM will generate the required code automatically.
- Prompt Suggestion – The Prompt Suggestion feature helps users refine and enhance the prompts they provide to the LLM. By clicking the black button next to the Code Generation button, users receive up to five improved versions of their original prompt.
These suggestions may add helpful context, recommend relevant libraries, or propose specific algorithms to use—making prompts more precise and effective. Users can then choose the version that best fits their needs, ensuring higher-quality code generation with minimal effort.
- Visualize Button – Located at the top-right corner, the Visualization Panel provides quick access to any charts or graphs generated during the data visualization pipeline step. This makes it easy to review outputs, validate transformations, and gain insights briefly—without leaving your workflow.
- Upload – Apart from generating code, the user also has an option to reuse any prewritten code scripts that they may have. These can be uploaded to any pipeline step using the upload button.
- Save and Run – Once the code has been generated, the user can test and analyse the output and store the final code using the save and run button.
Note : The first step in pipeline code generation is selecting a data source. Users simply choose the appropriate access keys from the prompted drop-down menu.
Once selected, the system automatically generates the code required to connect to the database and query the data—eliminating the need for manual setup and ensuring a seamless start to your pipeline.
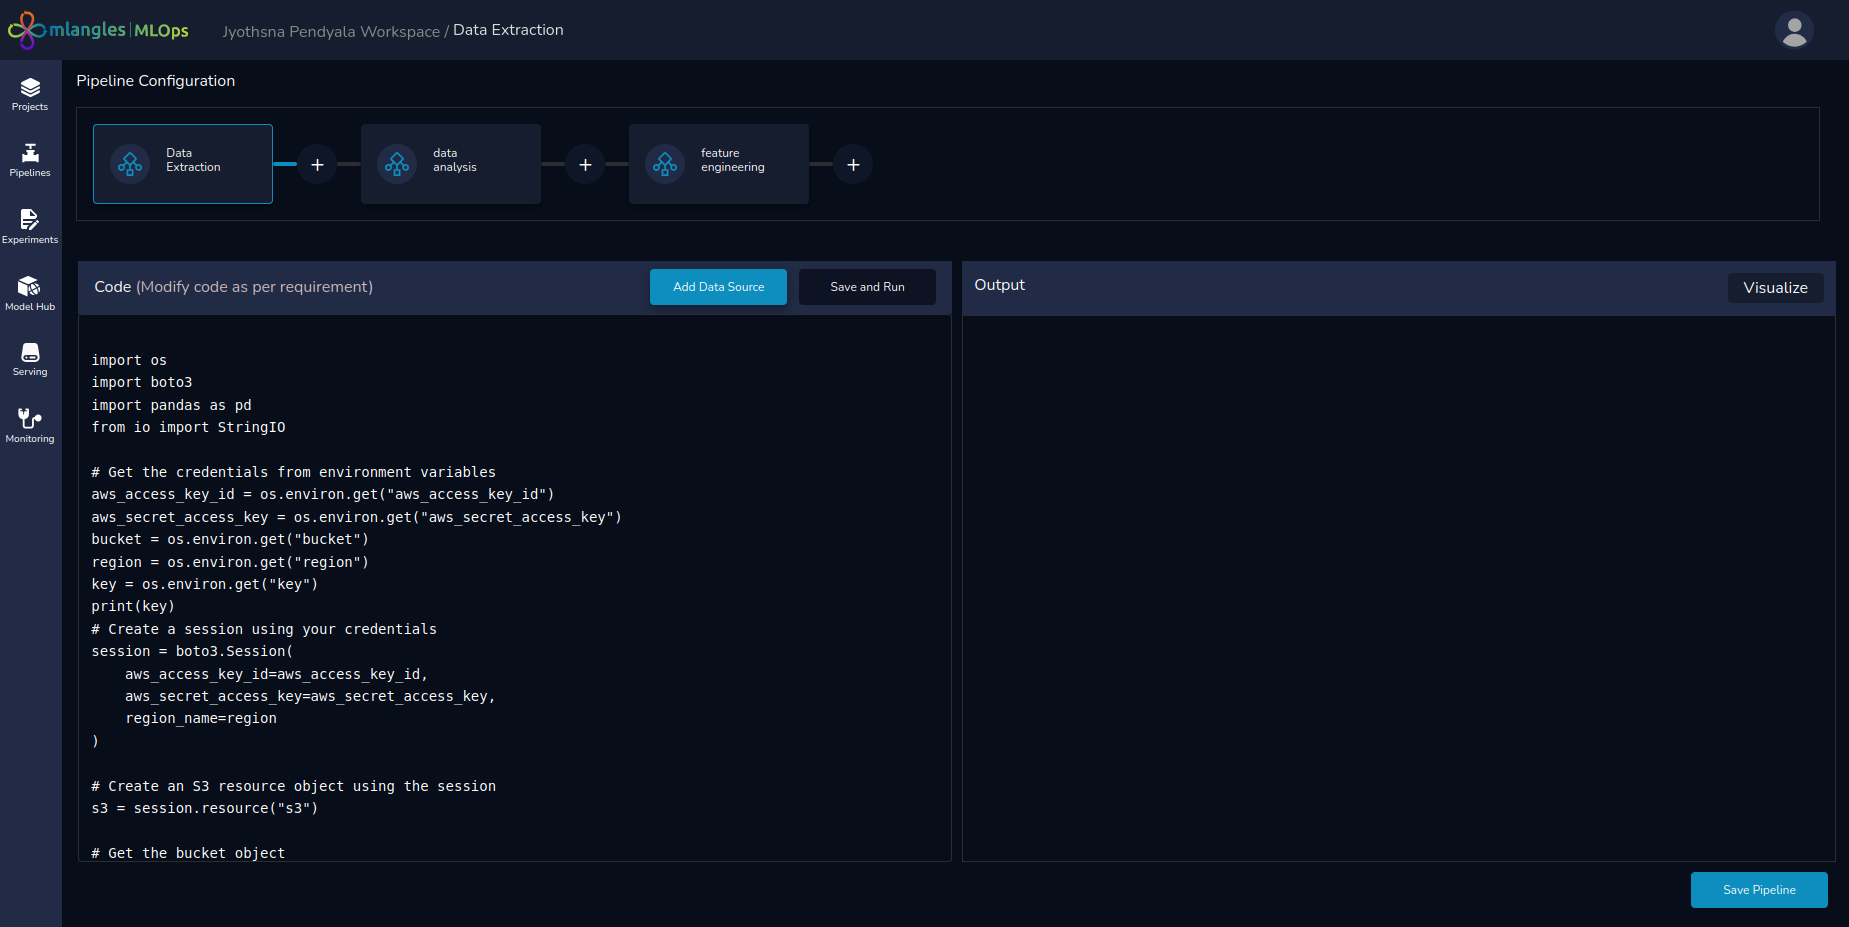
Figure 7 – Data Extraction
Executing and Monitoring Pipeline Steps
Step-Level Execution
To execute code for a single step , the user simply has to generate the appropriate code and click on Save and Run button. The output from the code is streamed to the right hand panel.
Data Transfer Between Steps
Note: Pipelines are designed to run sequentially, with each step building on the output of the previous one. To maintain data consistency and ensure smooth execution, the output from one step must be passed as the input to the next.
To achieve this, transformed data is transferred between pipeline steps in .csv format. Users should save the output of each step as data.csv, so it can be automatically consumed by subsequent steps without additional configuration.
Executing the Entire Pipeline
Once all pipeline steps have been finalized:
- Save pipeline by clicking the Save Pipeline button on the bottom right side screen.
- Once Save Pipeline button is clicked the code is pushed to its own repository and the user is taken to the pipeline home screen.
- In the home screen the user can click on Execute Pipeline button to start execution.
- Once the pipeline is executed the platform will:
- Run the pipeline sequentially from start to finish.
- Redirect the user to the Pipeline Execution Screen for real-time execution monitoring.
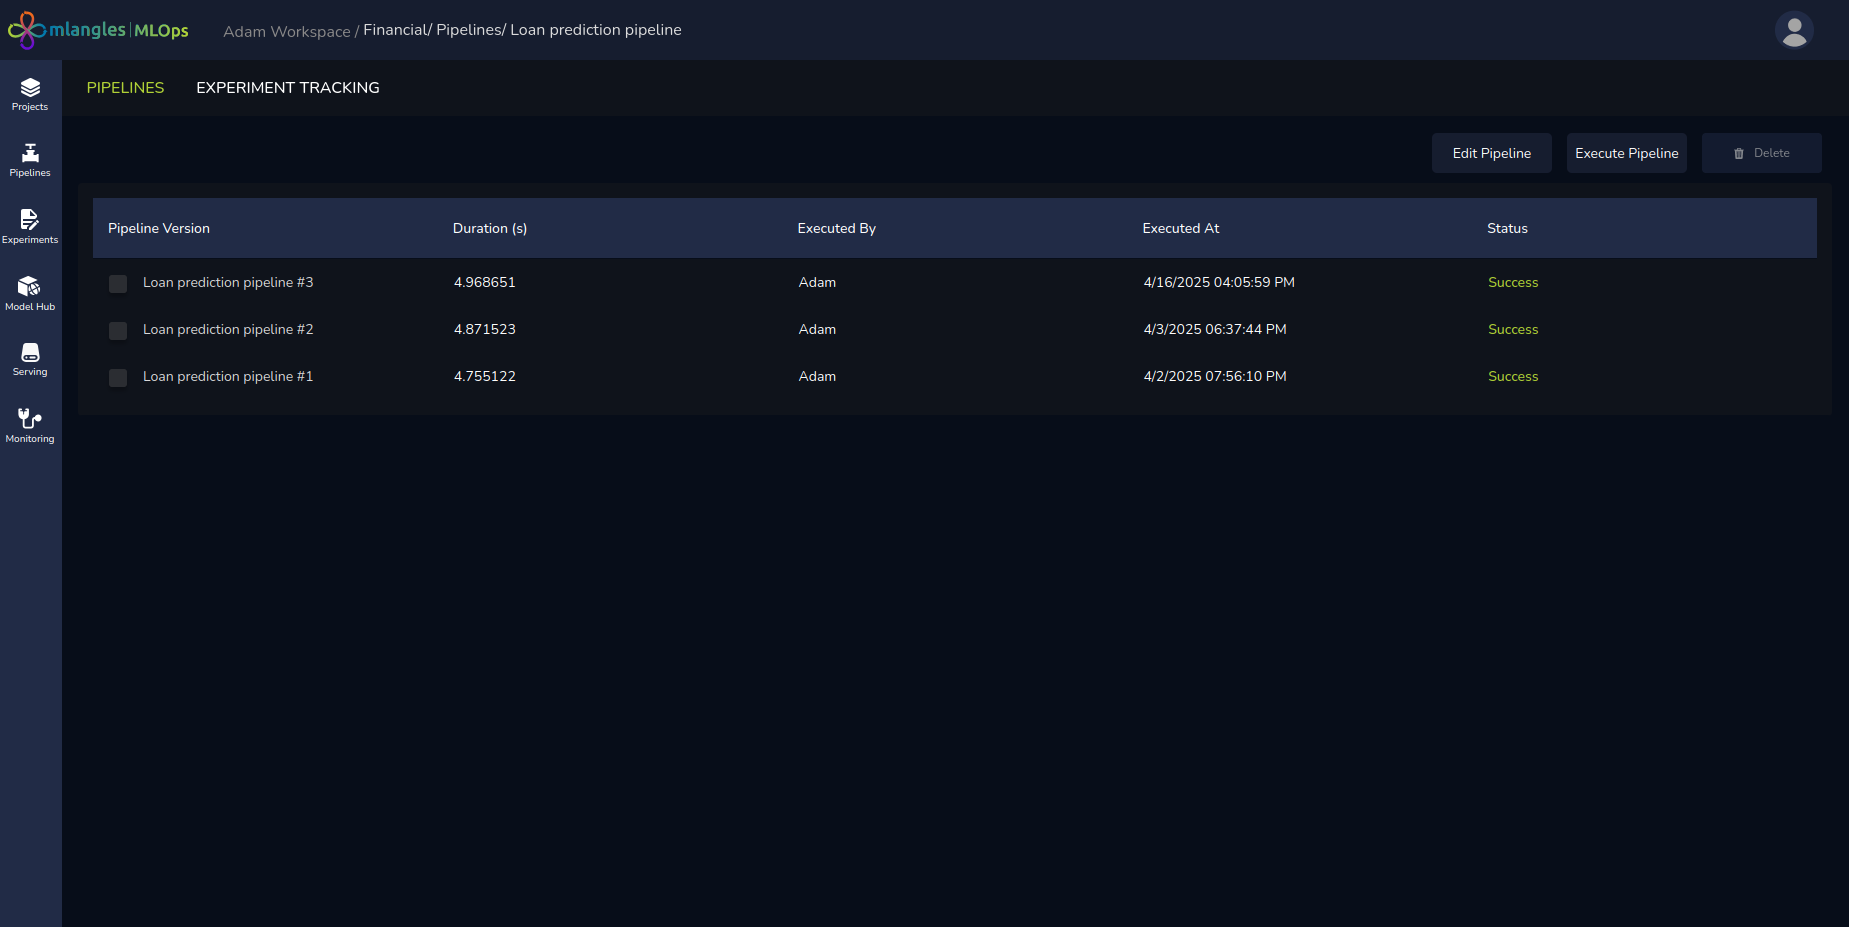
Figure 8 – Page for Individual Pipeline
Note: Users can edit any previously created pipeline by clicking the Edit Pipeline button. After making changes, it is important to re-run and test all steps to ensure accuracy and consistency. Once validated, the updated pipeline should be saved again to preserve the modifications.
Monitoring Pipeline Execution
- Each step displays one of the following statuses in the user interface:
- RUNNING – Step is in progress.
- FAILED – Step execution failed.
- SUCCESS – Step completed successfully.
- Execution time for each step is shown alongside its status.
Post-Execution Results
After a successful pipeline run, the tabs below the Pipeline Diagram display:
-
Logs – Detailed runtime logs for each step.
-
Visualizations – Generated visual insights from the pipeline.
-
Final Transformed Data – The processed dataset produced by the completed pipeline.
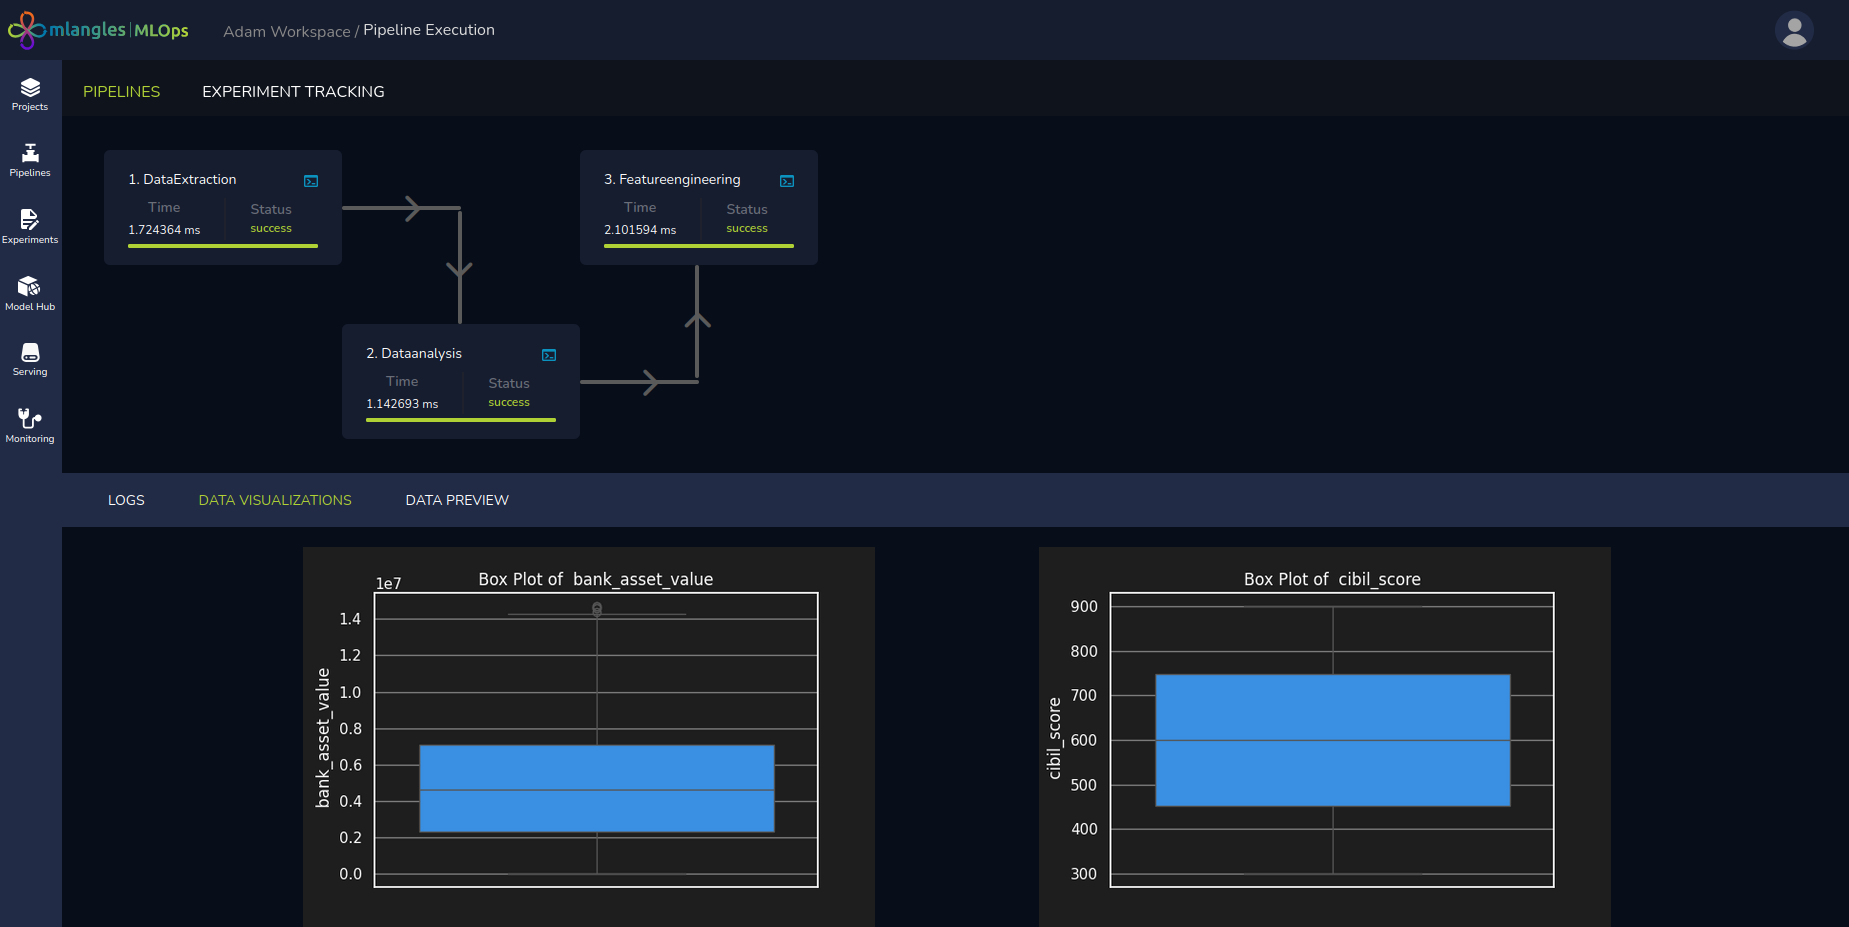
Figure 9 – Pipeline Execution Result Screen